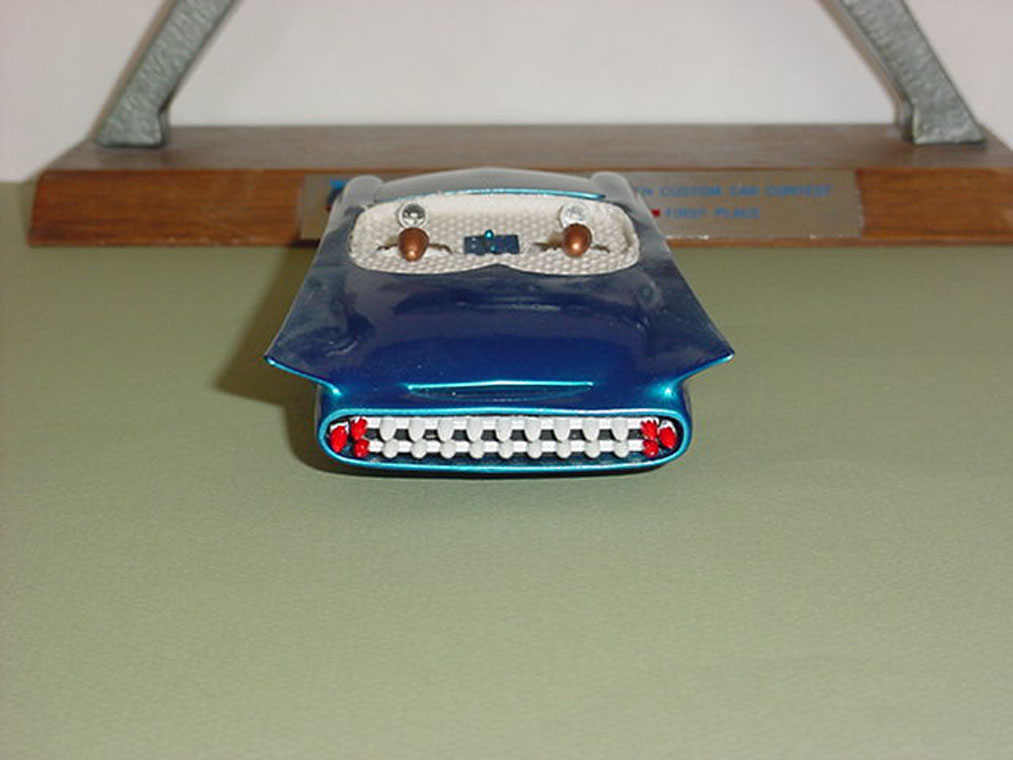
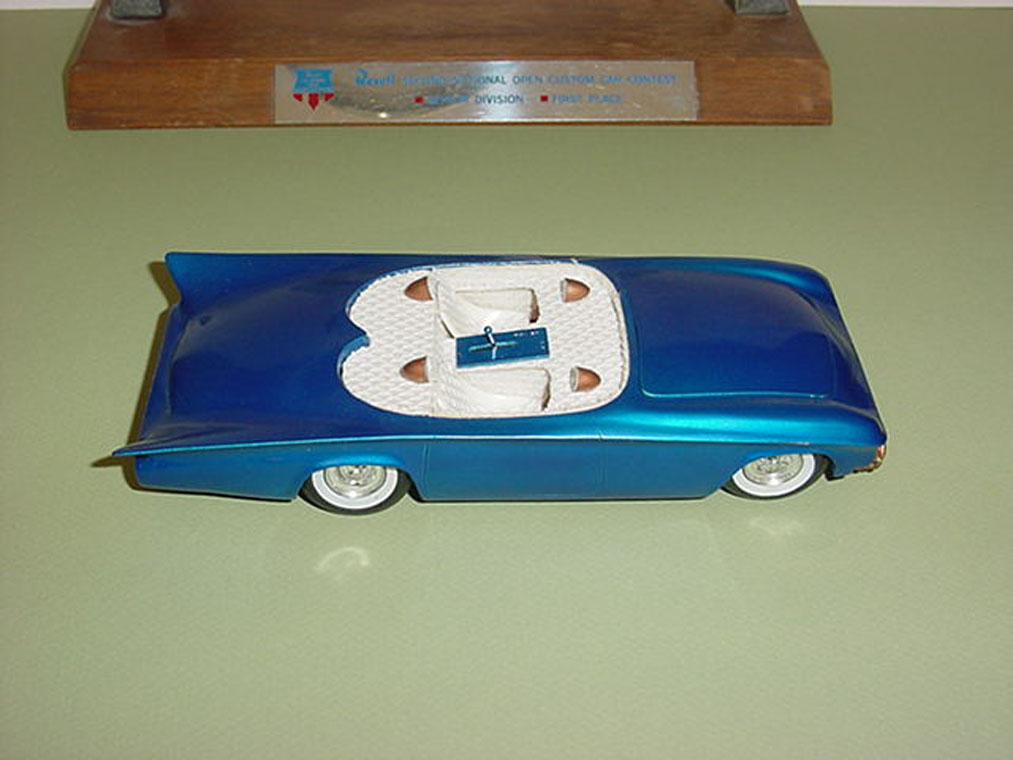
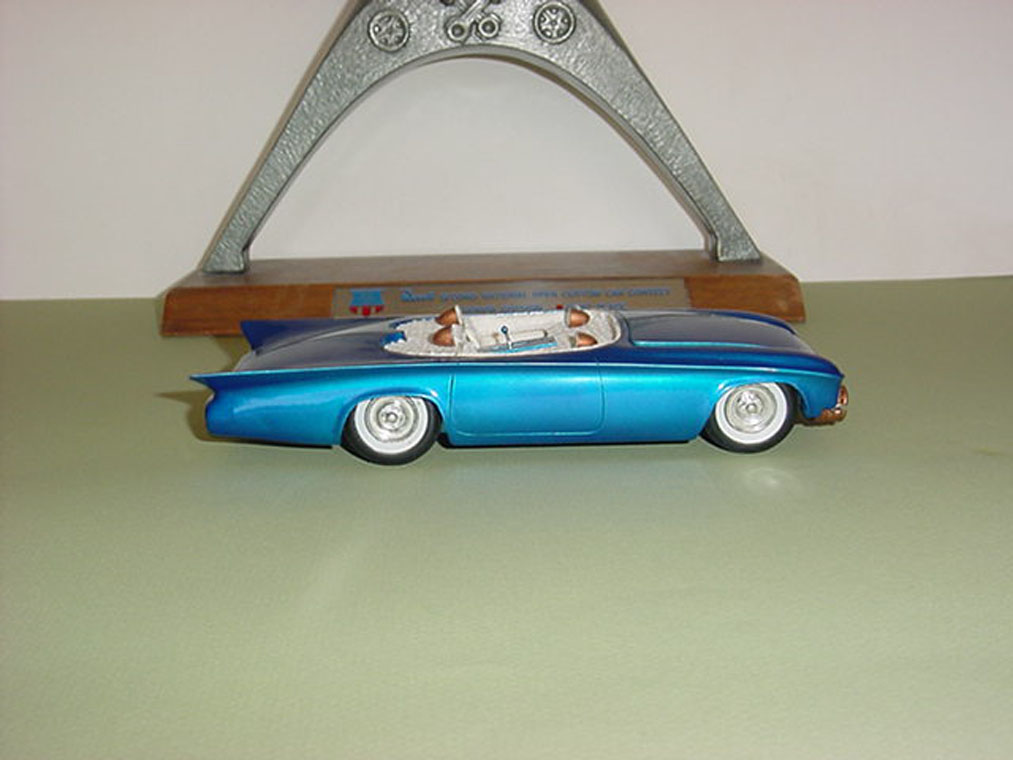
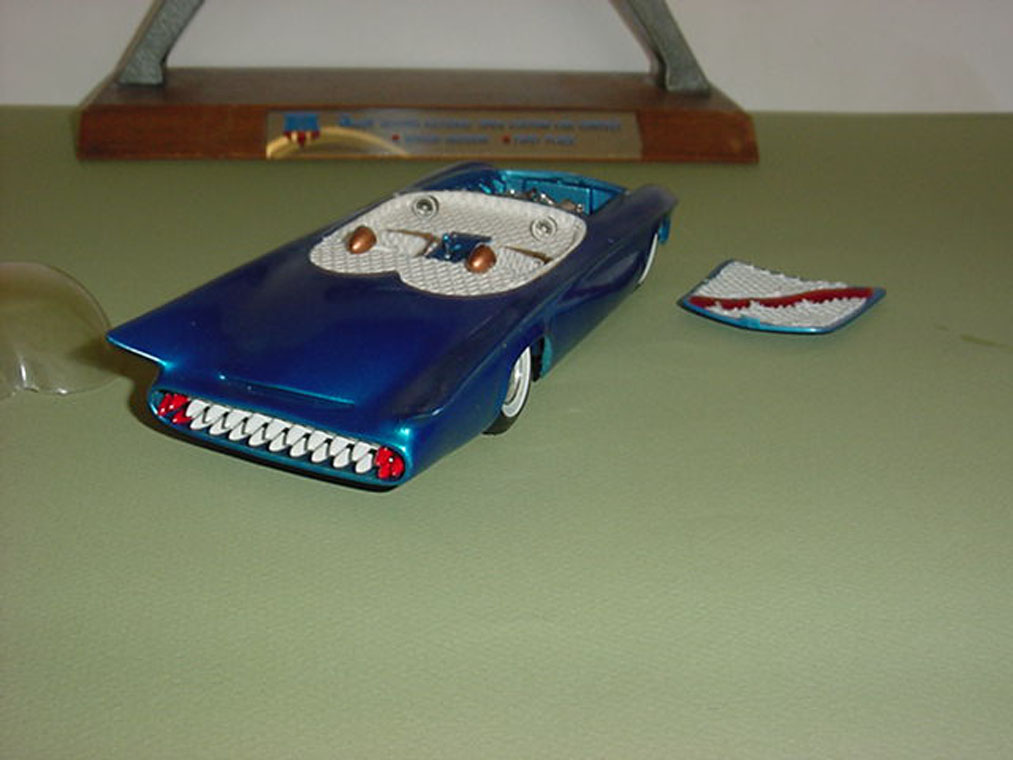
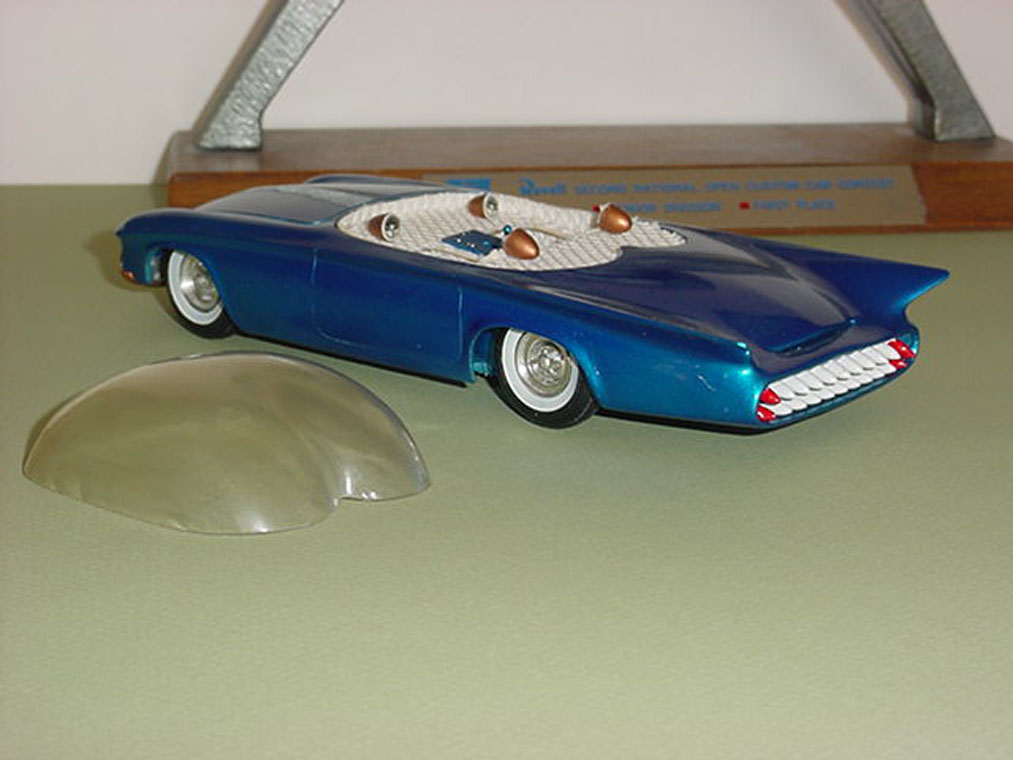
In 1962, noted builder Bob Peeples largely scratchbuilt a model of the first version of the Predicta. Predicta Project headquarters now has this model (Bob donated it) and we hold it with respect and awe because of the excellent quality build – made all the more poignant since Mr. Peeples passed away in 2011. Check out the following photos of this great model, and think about when this model was built.
Gustavson’s Version.
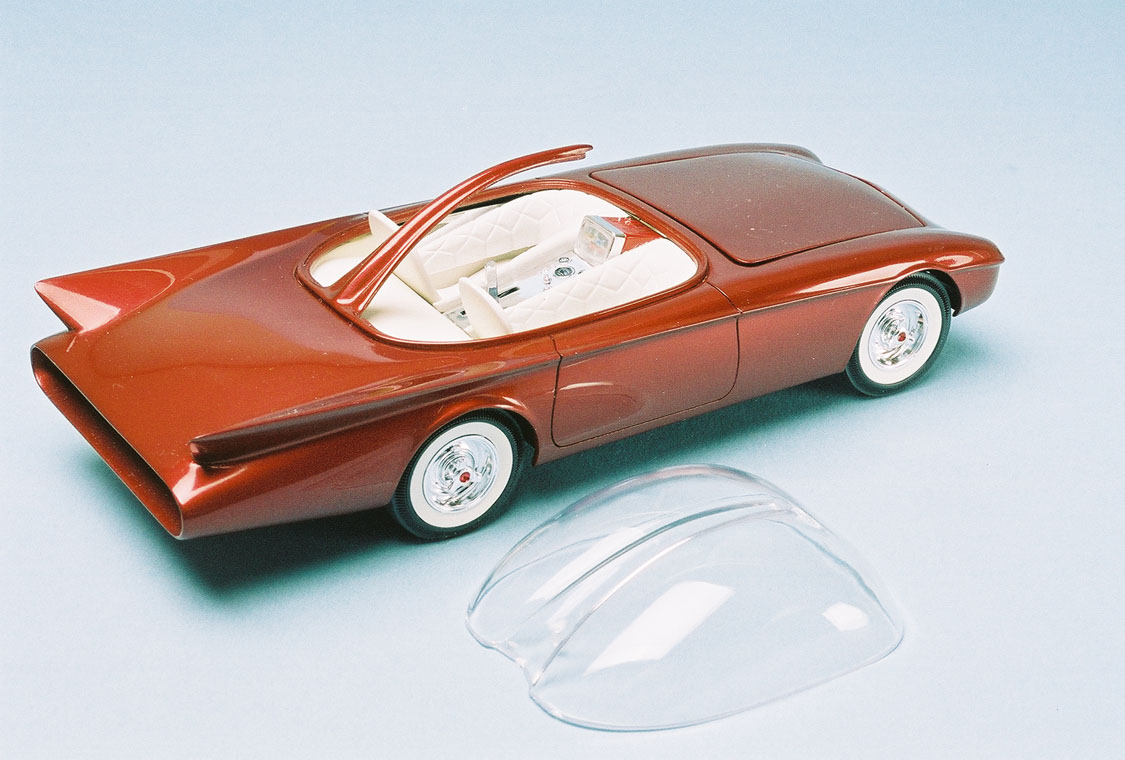
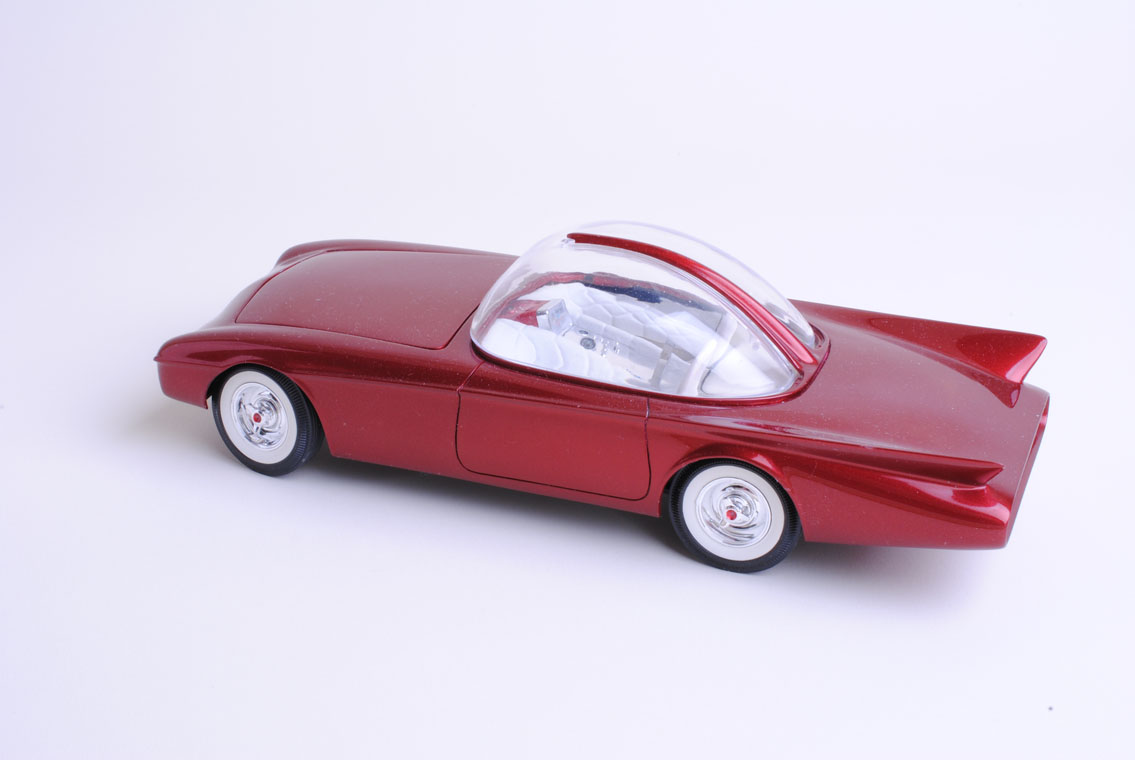
A few years ago, I decided that I wanted to do a quick build of the 2010 (didn’t want to use an earlier rare kit). Built straight from the box (with the exception of a micro-small color photo of the car in its 1964 guise), this model came together in about 3 weeks. Here are a few details:
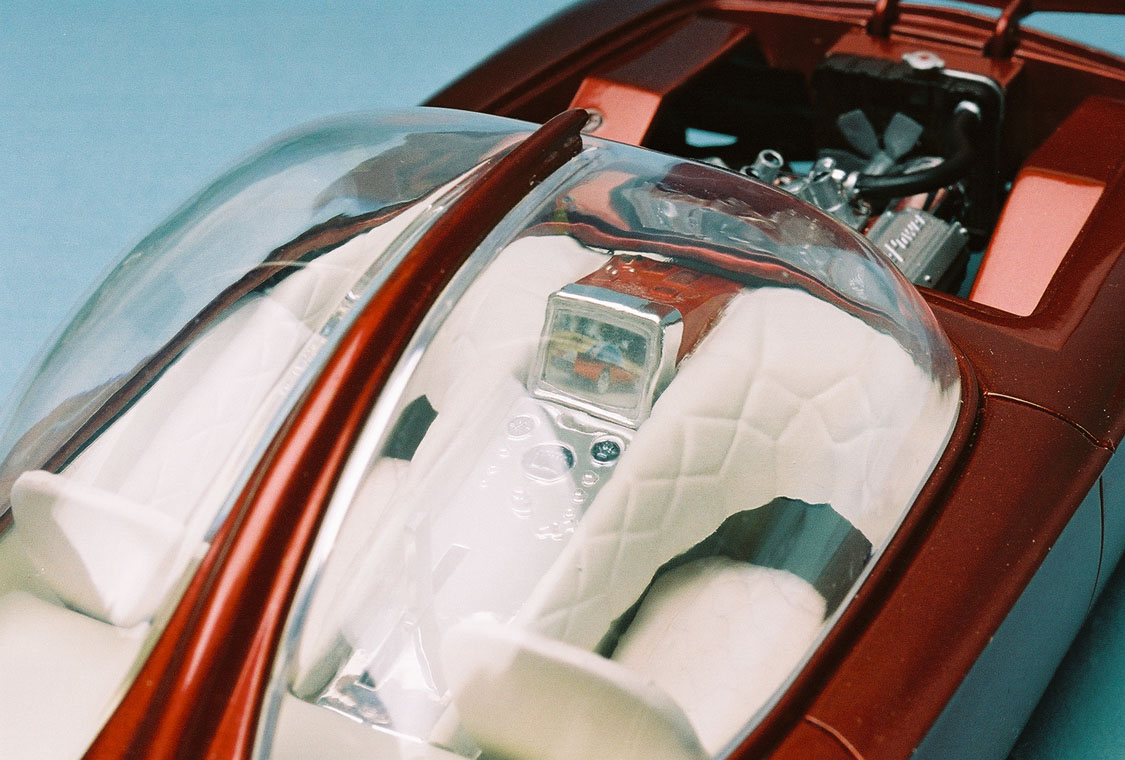
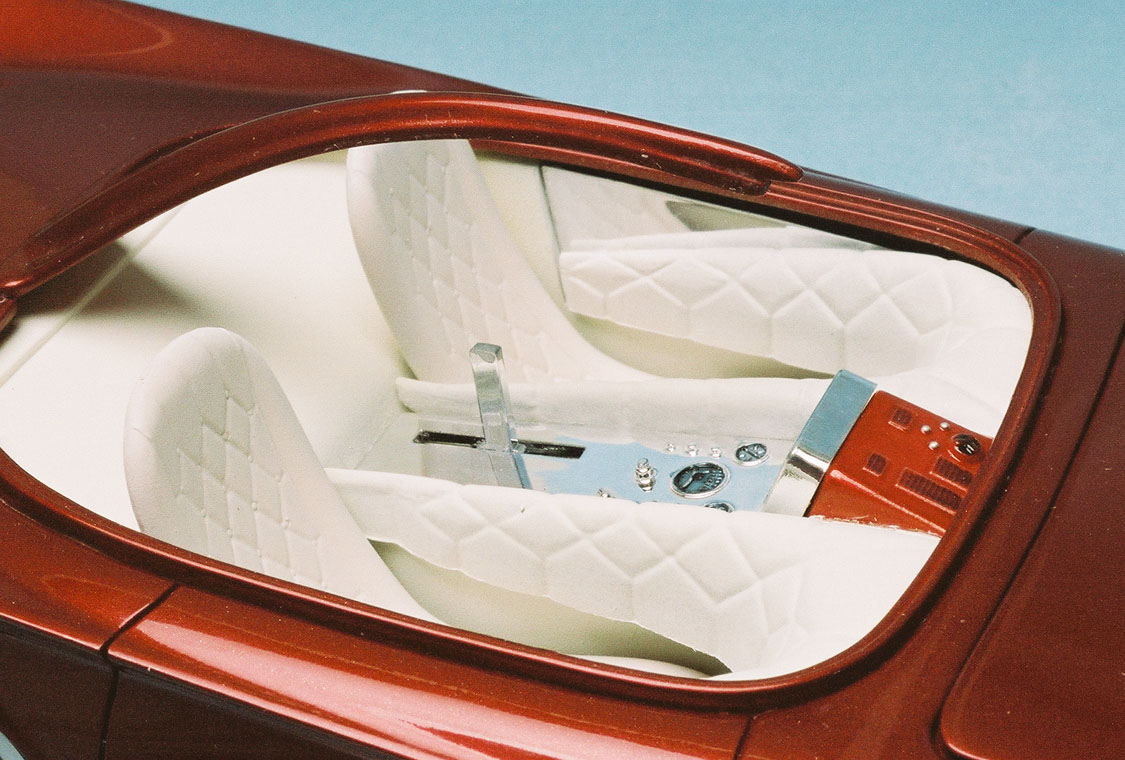
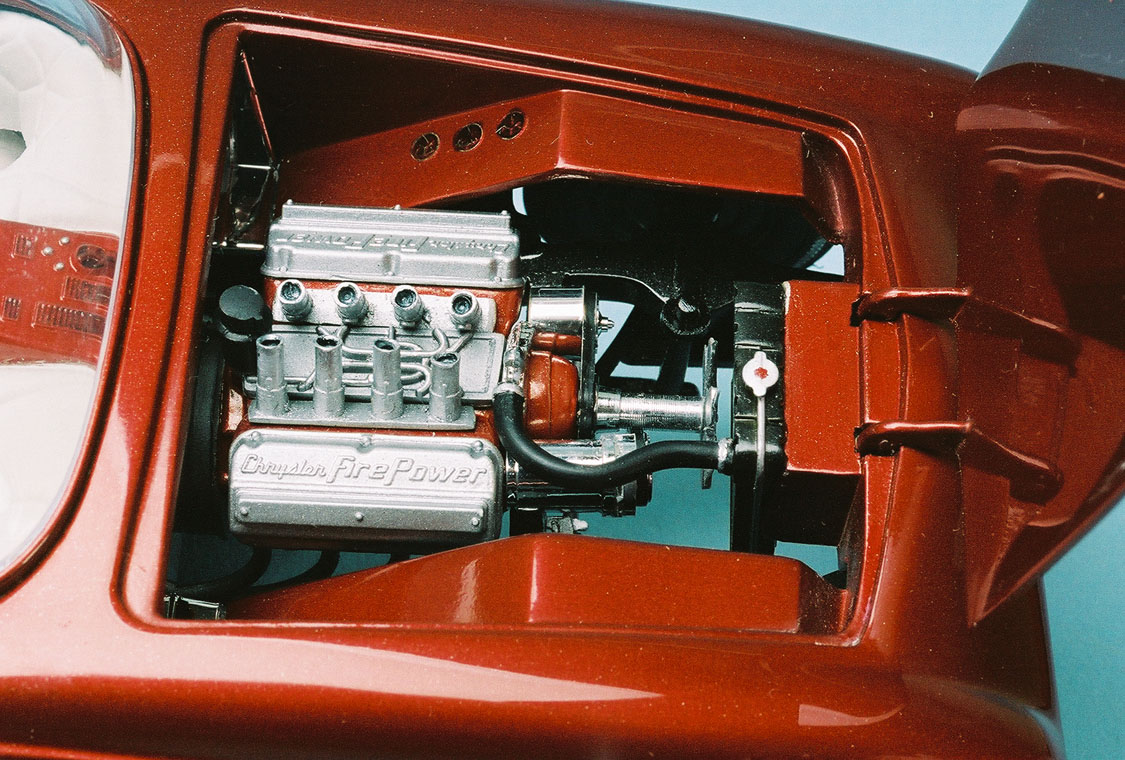
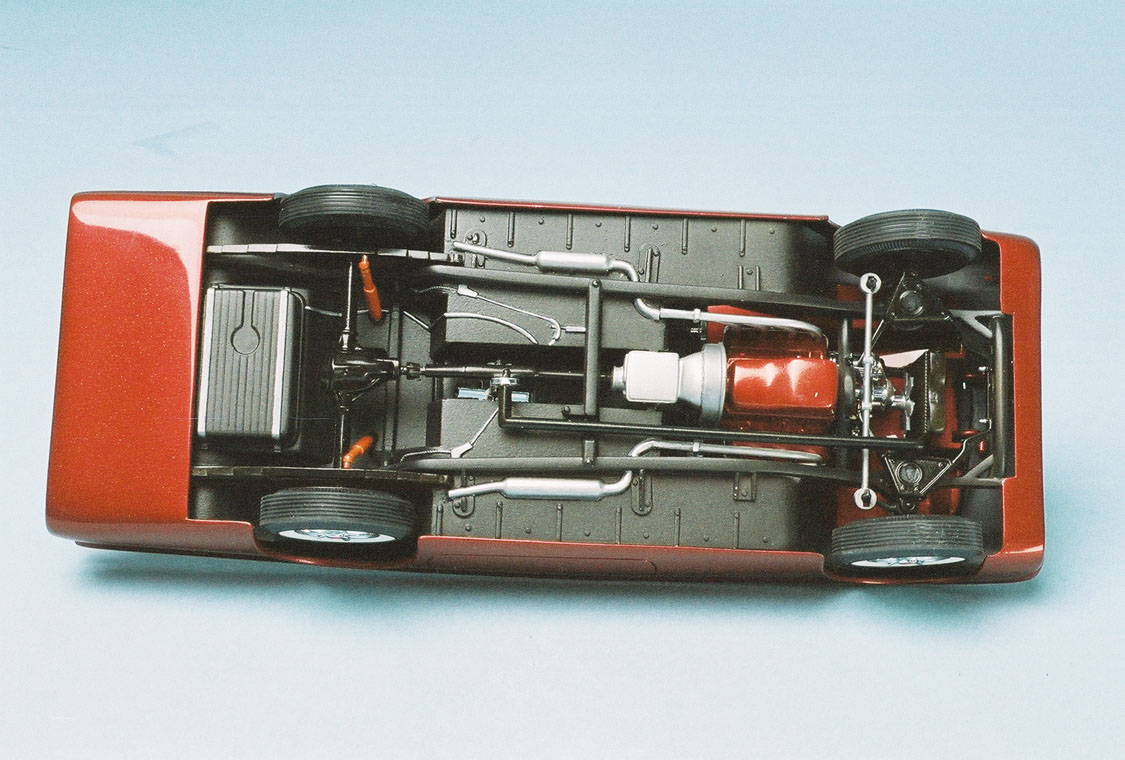
The bubble top ring didn’t fit the body worth a darn meaning that you either had to shave the bottom of ring – to taper it to fit the body. Even then, it didn’t fit. So, I shaped the ring, attached it to the body, and discovered that the bubble could slip into the combo ring/splitter. Not ever elegant when apart, but it solved the problem.The front and rear rolled pans, and the taillight grille shell, were all attached to the body and then the seams filled with Eurosoft catalyzed polyester putty. The rear deck isn’t close to accurate – it’s just flat in this model instead of reflecting the underlying shape of a 1956 T-Bird hood which appears on the 1:1 car.I mixed up a lacquer semi-candy with pearl powder in an attempt to match the rare original kit plastic. The color doesn’t match. But, with clear over the color and rubbed out, it’s a great paint job! Seen from a different angle, it’s pretty plain that the kit body doesn’t accurately pick up the shapes, proportions and dimensions of Starbird’s masterpiece.I mixed up some matte white and dropped just the smallest drop of the body paint color to tint the white to be sympathetic to the main color.I mixed up some matte white and dropped just the smallest drop of the body paint color to tint the white to be sympathetic to the main color. I scored a deep line between the TV and the surrounding upholstery panels, and painted it body color. I printed a small color image of the car just before Starbird delivered it to Monogram and planted the picture behind the clear screen.Like the other elements of this project, no extra-model details were imported to this build. The seams were filled on the engine, and the injector stacks were drilled out. Hose clamps were simulated in paint and the underside of the hood was smoothed.The chassis was painted a special mixture of silver and black to produce a dark grey color. Multiple steel colors were used. Before the dark colors were applied, the exhaust system was painted in Metallizer and then masked.
Mike Kucaba
Mike contacted me a few years ago by e-mail – he had apparently visited the old Predicta site and found my e-mail there. A fan of the car, Mike is building a 1/24 and 1/16 versions of the car. I’ve had the pleasure of sharing a few photos with him. I hope Mike will finish up these twin-scale models. Go here to enjoy his work!